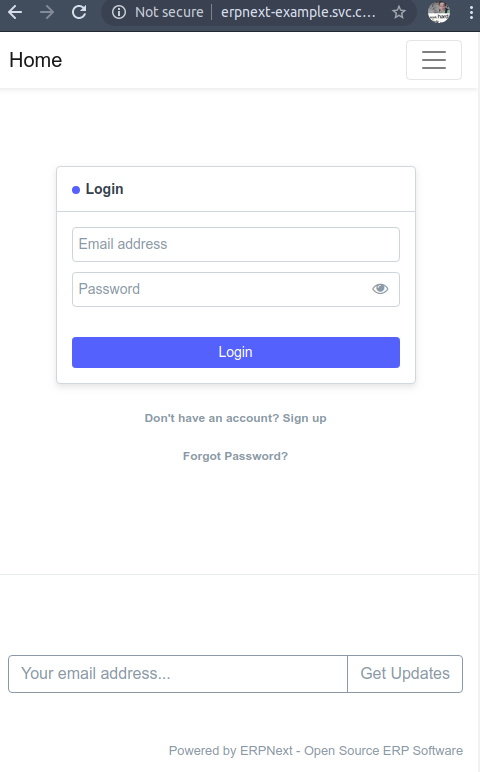
Access ERPNext at https://erp.lovia.life/desk
Login using “administrator”
Login using user “administrator” and the ADMIN_PASSWORD that you’ve set before.
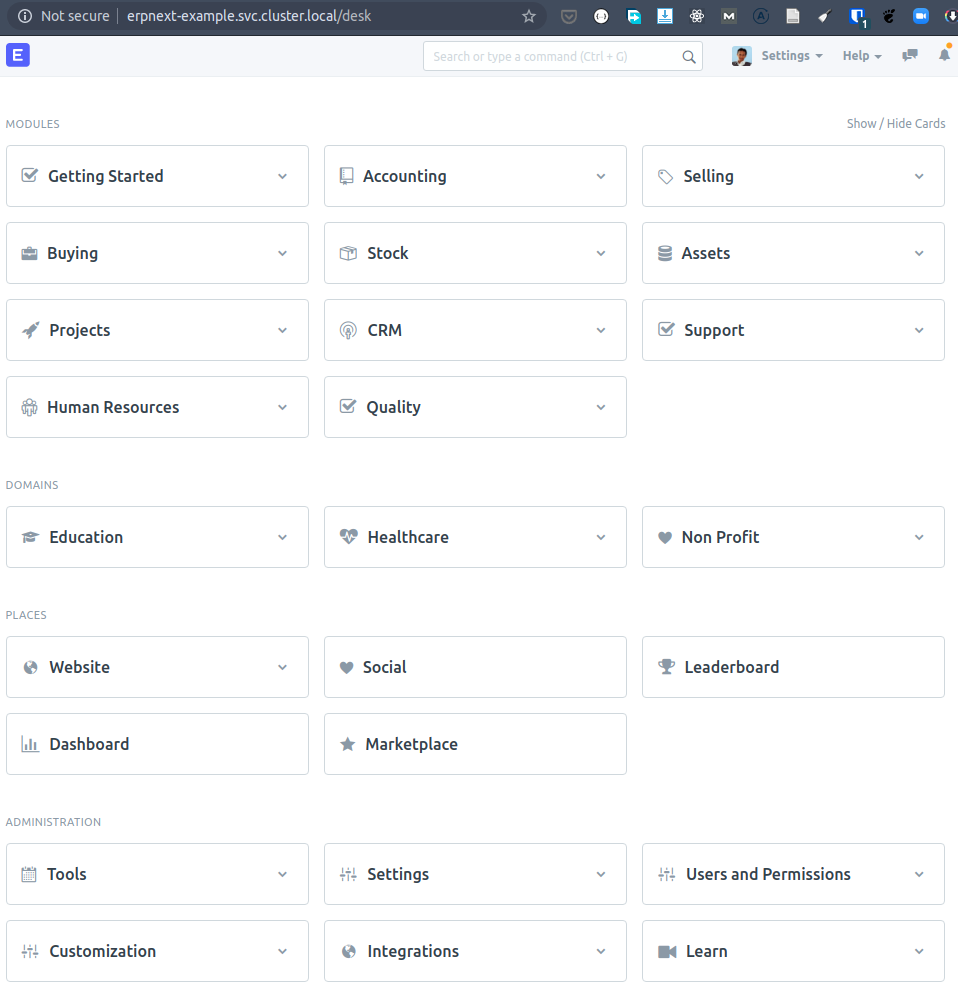
After logging in as administrator, you’ll need to set up your first company. After filling the forms, it’ll take some time to set up (about 2 minutes). You can follow kubectl logs for the erpnext pod to check progress, or to diagnose in case there’s an error.
Site Management Operations
Migrate Sites (e.g. to newer ERPNext Version)
See https://helm.erpnext.com/kubernetes-resources/create-migrate-sites-job
Migrate database: Create Kubernetes Job to run commands/migrate.py, e.g. migrate-sites-2020-08-09.yaml: (note: the following assumes you’re already using custom ERPNext Docker image lovia-worker)
apiVersion: batch/v1
kind: Job
metadata:
  name: migrate-sites-2020-08-09
spec:
  backoffLimit: 1
  template:
    spec:
      securityContext:
        supplementalGroups: [1000]
      containers:
      - name: migrate-sites
        # image: frappe/erpnext-worker:version-13-beta
        image: registry.gitlab.com/lovia/frappe_docker/lovia-worker:version-13-beta
        imagePullPolicy: Always
        args: ["migrate"]
        volumeMounts:
          - name: sites-dir
            mountPath: /home/frappe/frappe-bench/sites
      imagePullSecrets:
        - name: regcred
      restartPolicy: Never
      volumes:
        - name: sites-dir
          persistentVolumeClaim:
            claimName: frappe-bench-0001-erpnext
            readOnly: false
Then run it:
kubectl create -n erpnext -f migrate-sites-2020-08-09.yamlThen you’ll need to ensure Kubernetes is running the desired nginx, python, and socketio image versions. Either you change erpnext-values.yaml, or manually deleting the pods and let Kubernetes recreate the pods with newest images (when using pullPolicy=Always).
Push Backup to AWS S3
Push backup to AWS S3: See https://github.com/frappe/frappe_docker/blob/develop/docs/site-operations.md
Moving (Temporary) MariaDB Database to AWS RDS MariaDB
After installing ERPNext using a “temporary” MariaDB database, it’s better to move it to AWS RDS MariaDB so that the database is easier to maintain.
You’ll need to edit sites/common_site_config.json and sites/YOUR_SITE_site_config.json.
If you have access to bench, you can also use bench set-mariadb-host.
Resources:
- https://discuss.erpnext.com/t/updating-the-database-user-name-and-password/39099/6
- https://discuss.erpnext.com/t/remote-database-setup/22687/6
- https://discuss.erpnext.com/t/separate-database-server-and-erpnext-application-server/22921
Here’s how to move from temporary MariaDB database to AWS RDS MariaDB:
- Open bash inside frappe-bench-0001-erpnext-worker by using kubectl exec.
Alternatively you can run client using MariaDB Kubernetes. (check using:helm get notes-n mariadb mariadb)kubectl run mariadb-client --rm --tty -i --restart='Never' --image docker.io/bitnami/mariadb:10.4 --namespace mariadb --command -- bash - Inside the mariadb-client shell, dump the temporary database: (–routines is important! MySQL for some strange reason disabled this by default! But it seems ERPNext doesn’t use them… yet?)
mysqldump --routines --opt -h mariadb.mariadb.svc.cluster.local -u root -p (db_name) > FILENAME.sql - Create the new user on AWS RDS MariaDB
CREATE USER (user_name)@'%' IDENTIFIED BY (password_in_quotes);
CREATE DATABASE (db_name) DEFAULT CHARACTER SET utf8mb4 COLLATE utf8mb4_unicode_ci;
GRANT SELECT, INSERT, UPDATE, DELETE, CREATE, DROP, REFERENCES, INDEX, ALTER, CREATE TEMPORARY TABLES, LOCK TABLES, EXECUTE, CREATE VIEW, SHOW VIEW, CREATE ROUTINE, ALTER ROUTINE, EVENT, TRIGGER ON (db_name).* TO (user_name)@'%';
FLUSH PRIVILEGES;- Restore the database to AWS RDS MariaDB:
mysql -h (RDS_host) -u (user_name) -p (db_name) < FILENAME.sql - Open bash inside frappe-bench-0001-erpnext-worker by using:
kubectl exec -n erpnext frappe-bench-0001-erpnext-worker-d-89bf7874c-4mztc -it -- bash - You may want to install nano:
apt update && apt -y install nano - Edit SITE/site_config.json and change the db_host, also add
"rds_db": 1 - Edit common_site_config.json and change the db_host, also add
"rds_db": 1 - Restart all pods inside erpnext namespace:
kubectl delete --all pods --namespace=erpnext
After it’s “quite done”, press Ctrl+C (otherwise it will get stuck). - You can delete the temporary mariadb:
helm delete -n mariadb mariadb - Delete MariaDB’s PVC:
kubectl delete pvc -n mariadb data-mariadb-master-0
“Uninstall/Reinstall” ERPNext from Kubernetes
Basically you do the reverse of installation:
- (If you just want to reinstall, you don’t need to delete ingress). Delete ERPNext’s ingress:
kubectl delete -f frappe-bench-0001-erpnext-ingress.yaml - Delete the ERPNext Helm release:
helm delete -n erpnext frappe-bench-0001 - Delete the MariaDB database Helm chart:
helm delete -n mariadb mariadb - Ensure no ERPNext pods are stuck:
kubectl get po -n erpnext - Delete MariaDB’s PVC:
kubectl delete pvc -n mariadb data-mariadb-master-0 - Delete the nfs-server-provisioner NFS:
helm delete -n nfs-server-provisioner nfs-server-provisioner - Delete NFS PVC:
kubectl delete pvc data-nfs-server-provisioner-0
Troubleshooting: Email Not Sent (Yandex.Mail)
First, check Inbound email (IMAP), because it is easiest to get working. If it’s working, we can check the Outgoing email configuration.
Check Email Queue > List.
References: https://discuss.erpnext.com/t/emails-not-sendng/26862/7
About Frappe Cloud
There is Frappe Cloud that can be used to host ERPNext instances starting at $10/mo per site (1 daily hour), $25/mo per site (2 daily hours) to $50/mo per site (4 daily hours). It is an interesting offer instead of running our own ERPNext inside Kubernetes, with MariaDB, etc. To compare, in DigitalOcean Kubernetes:
- $10 = 1 Gi memory limit (from raw 2 GB)
- $20 = 3 Gi memory limit (from raw 4 GB)
- $40 = 6 Gi memory limit (from raw 8 GB)
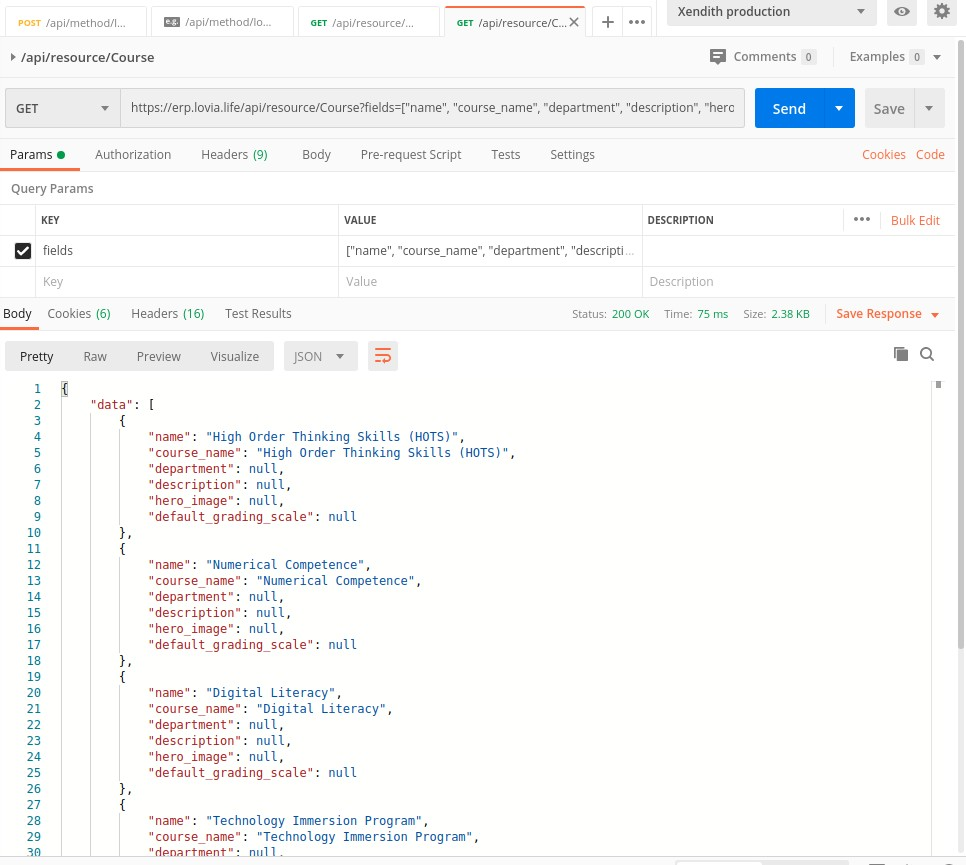
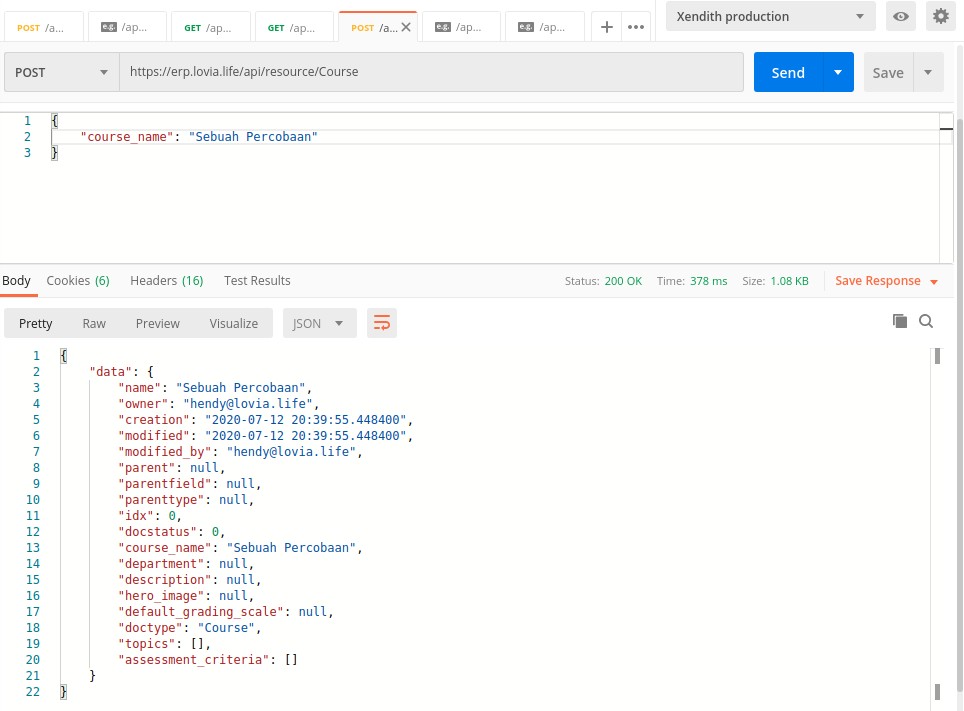
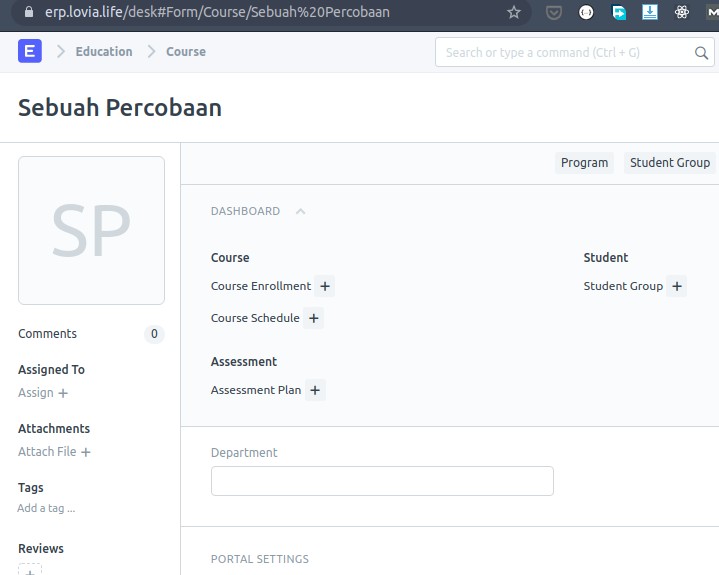
REST API
Resources:
API Key & API Secret
- Go to your user’s User Settings
- API Access > Generate API Key, save the API Secret. Then refresh the browser to see the API Key. You will need both API Key and API Secret to use REST API.
To call authenticated REST API, use Basic authentication in header with username=API Key and password=API Secret.
Reference:
3-day Temporary Token (sid)
First you’ll need to use /api/method/login and get the sid which can be used as token: HTTP request header.
List of Document Types under Settings -> DocType.
Developing Custom App in ERPNext
See ERPNext > Developing Custom Apps.
Store File Uploads/Attachments to Amazon S3
This is not built-in supported. However there is custom app zerodhatech/frappe-attachments-s3 which is still maintained as of July 2020.
The caveat is that files will still be stored on NFS (or Ceph) first, then mirrored to S3. So it is not a native feature (unlike Strapi’s Provider).
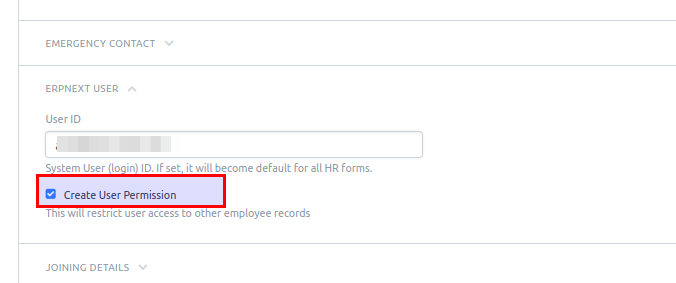
Troubleshooting: HR Manager Cannot See All Employees
Make sure in HR Manager’s user, “Create User Permission” is unchecked. If it’s already checked, unlink the user from that employee, then re-link.
Reference: https://discuss.erpnext.com/t/as-an-hr-manager-i-cannot-see-all-employees/44548/8
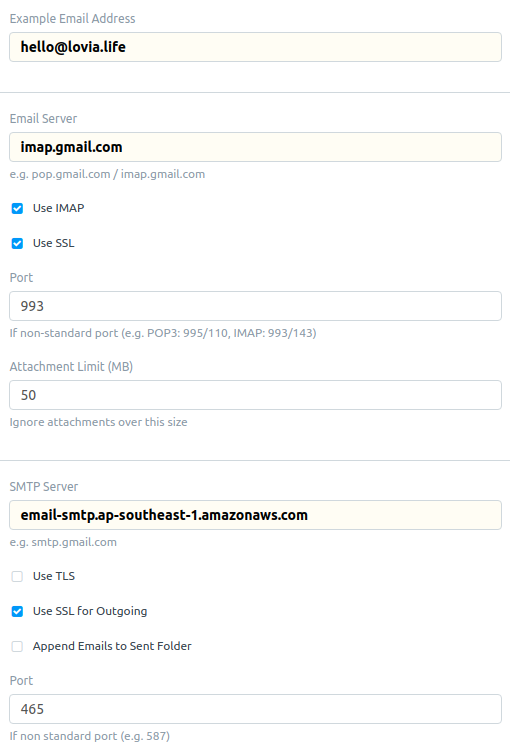
Email Sending & Incoming Configuration
AWS SES
First, make sure that the domain is verified in AWS SES in region ap-southeast-1.
Email Domain
Set email domain as follows. “Use TLS” actually means “Use STARTTLS”.
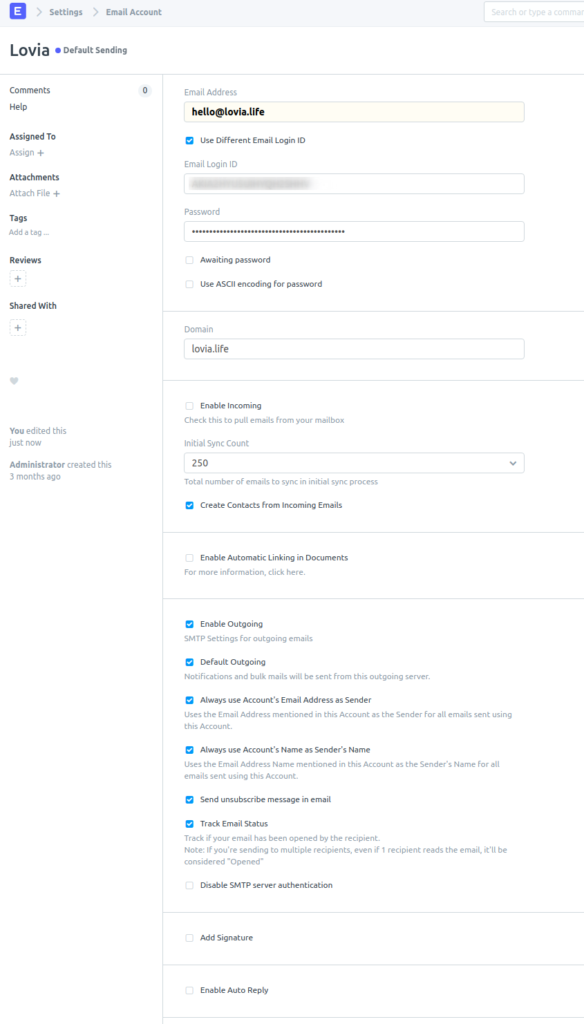
Email Account: Default Sending
Rename the account to “Lovia”. Options “Always use Account’s Email” and “Always use Account’s Name” needs to be checked, so it will not “pretend” to be someone else. Each user should have their own Email Account document if want to send under own name.